Assembly and Installation
Installing the Adapter
The installation of the adapter is well shown in this video.
- Disassemble the T Display, be careful - the side covers on the buttons may fall out.
- Carefully unclip and remove the orange cover with the magnet.
- Reassemble it.
- Install the adapter as shown in the video, ensuring that the contacts and polarity match.
Firmware
To install TGSN, you must have WiFi with DHCP!
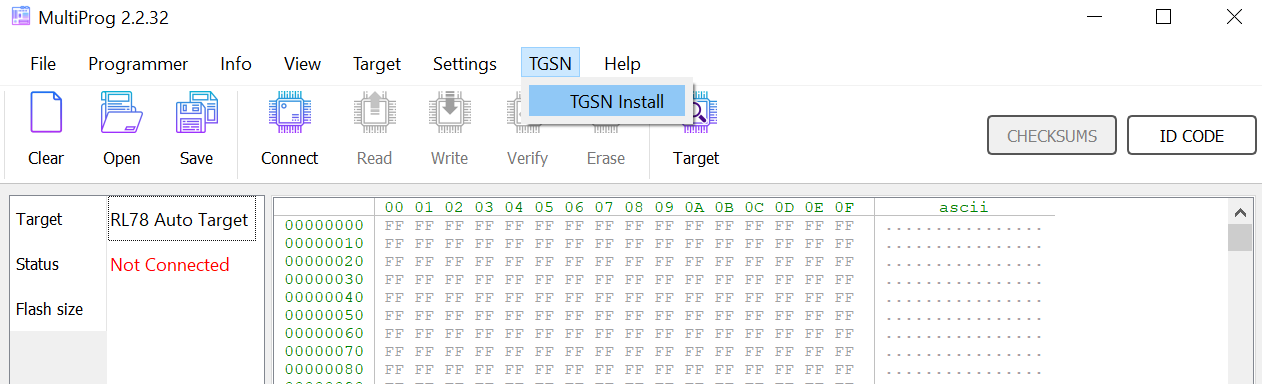
TGSN is flashed using MultiProg. Go to the menu TGSN->TGSN Install.
 The entire process is shown in this video.
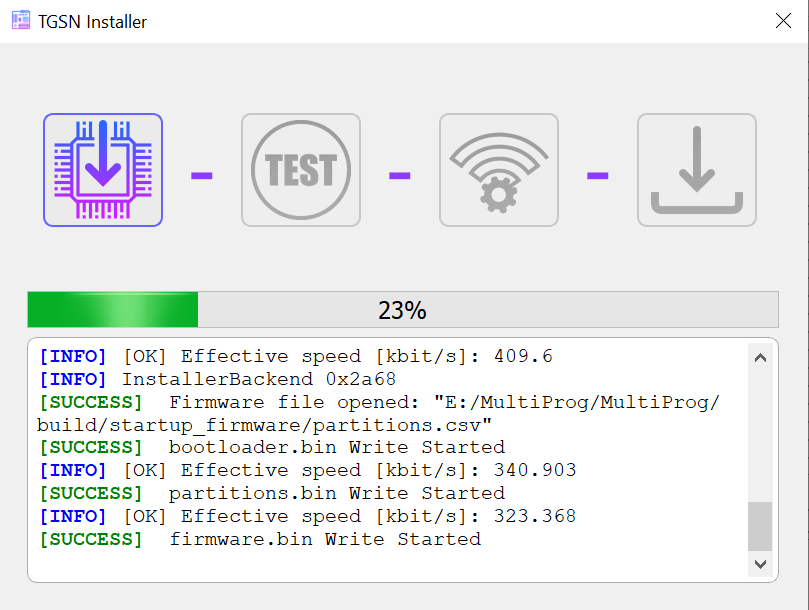
The flashing process is divided into 4 stages:
- Flashing the Bootloader (startup_firmware). The first icon is Flash startup.
- Checking communication with the Bootloader + hardware test. The second icon is TEST.
- Connecting the Bootloader to the WiFi network and authorizing on the server. The third icon has the Setup WiFi symbol.
- Self-flashing the Bootloader firmware from the server. The fourth icon has the Online-installation symbol.
Flashing the Bootloader
Before flashing, it's better to put the T Display into programming mode using the buttons.
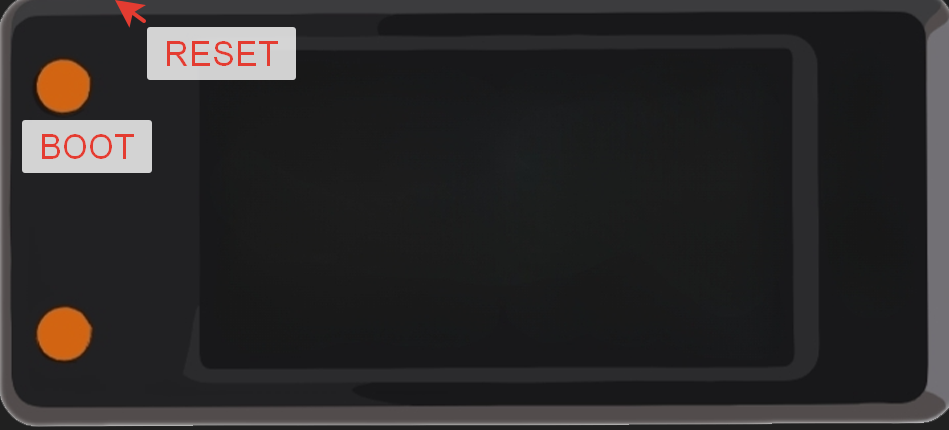
- To do this, press and hold the reset button (on top, at the edge) and the boot button (top left).
- Hold for 2-5 seconds.
- Then release reset while keeping boot pressed.
- Finally, release boot. Now we can perform the initial flashing of the Bootloader (startup_firmware). Click on the first icon Flash startup.
Bootloader Version Control
When you turn on the Bootloader, you will see version data, git hash, and build time on the display. This may be useful when contacting support for issues during the initial installation of TGSN.
TEST Bootloader and Hardware
Before TEST Bootloader, the adapter must already be installed.
After flashing the Bootloader, make sure to reset the device using the button or reconnect via USB. Click on the second icon TEST. If everything is okay, you will see a log message that UART testing was successful.
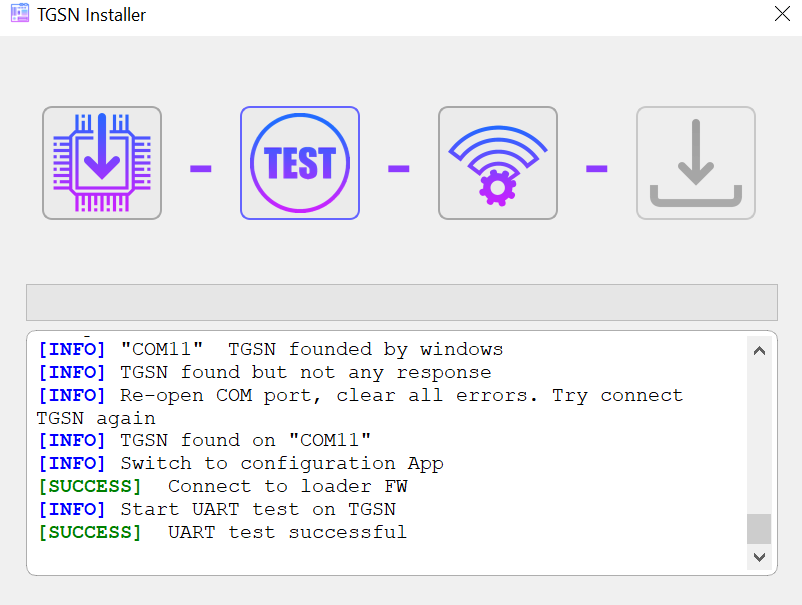
In the current version, the test involves sending a long packet to the UART bus (TOOL0) and reading back echo.
If there are issues with USB, power, adapter, or T-Display, the test may fail.
WiFi Setup & Authorization
Now click on the third icon, which became active after testing - Setup WiFi. Give the Bootloader a command to scan for available networks, select yours, and enter the password.
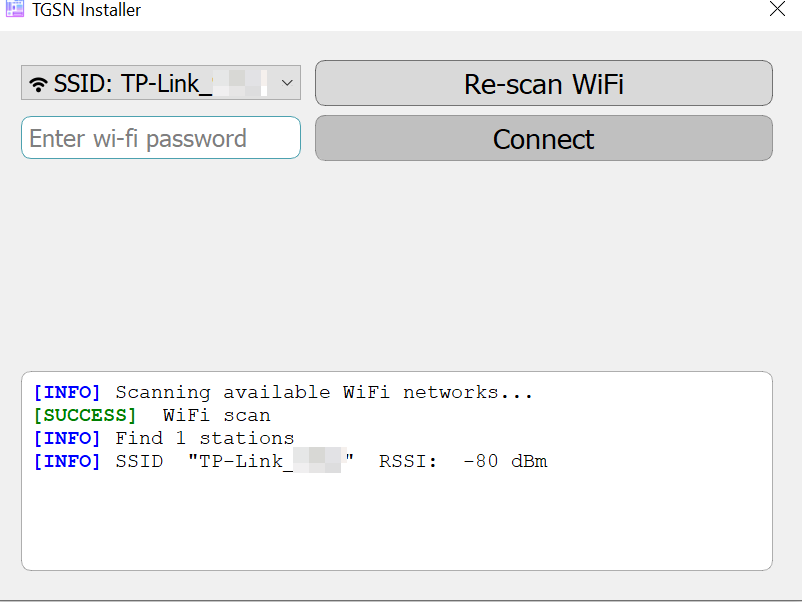
Next, an authorization window will open - you need to enter account details for Bootloader authorization on the server.

Online Installation (OTA - Over The Air Update)
The final step is for the Bootloader to download the TGSN firmware from the server and overwrite the device. If there were issues with the network at this stage, and installation had to be interrupted, you can close MultiProg and start again from the TEST stage.
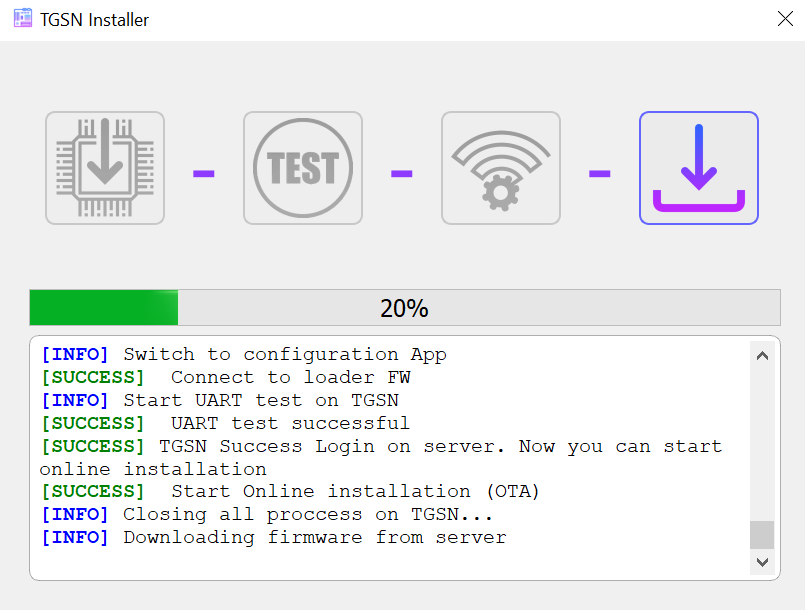
Great, TGSN is ready to work, let's go 🚀
Changing WiFi Settings / Changing Account Data in TGSN
On an already installed TGSN, you can change the WiFi network or password. To do this:
- Open TGSN Install
- Perform TEST
- Go to Setup WiFi and follow the procedure above.
- To exit, simply close TGSN Install