TGSN
TGSN Interface
Buttons
Auto-connect with the controller. Upper button. More details on working in standalone mode
Settings and Additional Features Menu. Lower button.
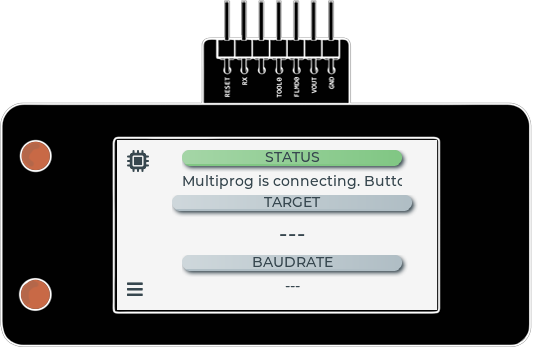
STATUS - Programmer status
TARGET - Name (signature) of the connected controller.
BAUDRATE - Baud rate of the connection.
Settings and Additional Functions Menu
Menu Navigation
- Entering the menu - press the Settings and Additional Functions Menu symbol (see above), bottom button.
- Navigating the menu - regular press of the upper-lower button (up-down).
- Enter menu item - long press of the upper button.
- Exit menu - long press of the lower button.
Menu Items
- Pin Test — a subprogram for debugging adapters and pins. Provides a signal to the pins cyclically once a second.
- Version — version data + git hash + build time, the
User: <username>this TGSN is provisioned for, and the alphabetically-sorted list of installed firmware modules (see Module management). - Update — Bootloader-level update from the server. Modules are installed only through TGSN Install in MultiProg (see Module management for the full flow). This screen also shows a "Please install modules via TGSN Installer" hint if no modules have been installed yet. Requires a valid WiFi configuration on the device.
Video on working with the menu
Settings App
The TGSN device has a separate Settings app in the main launcher
(alongside TGSN, FlowMeter, MotorPumpDrive, etc.) — long-press
the lower button on the home screen, navigate to Settings.
This app holds everything that is not part of programming:
-
Load at startup — pick which app launches automatically when the device powers up.
-
Encoder type — how the on-device encoder is decoded:
Full cycle (4 phase)— default, every detent = one step;Half cycle (2 phase)— for encoders that emit two transitions per detent.
Selection is saved to NVS and applied immediately.
-
Enable / Disable 5V PU — toggle the always-on 5V power-up rail on the adapter (used for HART, TMPM, and other 5V-only targets). On enable the device shows a popup with the measured
mVandmA; on disable, a confirmation popup. State is read from the hardware on entry, so the label always matches reality (Enable 5V PU/Disable 5V PU). Errors (I2C not ready, etc.) are surfaced in the same popup. -
To Main Menu — back to the launcher.
Working in Standalone Mode
TGSN can operate in standalone mode. In standalone mode, TGSN performs only Auto-connect with the controller, identifying its name-signature.
Do not allow reverse polarity, especially in standalone mode.
Video on working in standalone mode
Basic Programming with MultiProg
After selecting the controller and establishing a connection, TGSN will read the protection settings of the target controller. In the case of RL78, this will involve checking the ID & OCD byte as well as the security flag.
If an attempt is made to read with protections enabled, TGSN will issue a corresponding error and will not erase the controller.
Additional Functions
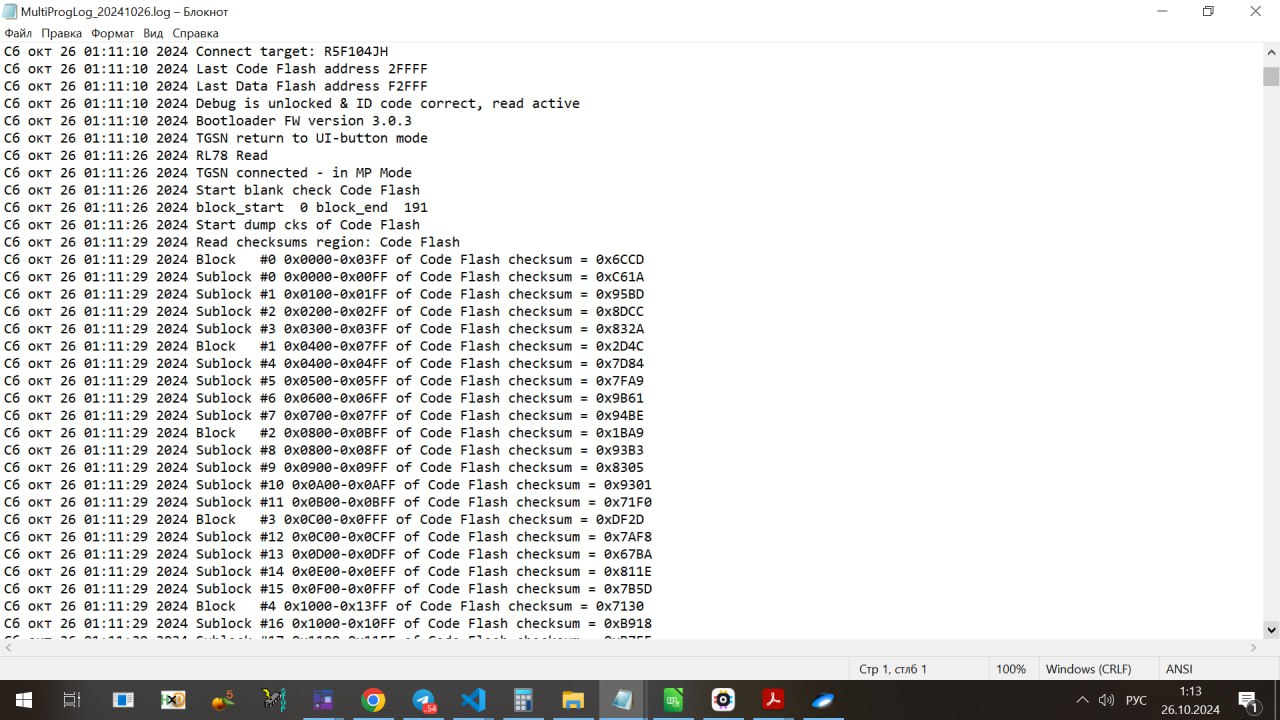
- Checksum - dumping the checksum of each block and sub-block.
- ID Code - (RL78) setting the ID-Code.
Recommendations
Logging and documentation are very important when working with RL78/NEC controllers. For this purpose, when selecting TGSN in MultiProg, set the logging level to maximum - i.e., everything possible will be logged.
If another programmer is selected, the logging level will revert back to normal.
A good practice is to save the log and the checksum dump along with working files for the target controller-board.
Protection Against Reading RL78
There are four options for closing RL78:
- ID code.
- 10X0xFF ID.
- ID code + 0x84 OCD. According to the documentation, there should be erasure upon entering an incorrect ID.
- OCD 0x04 (the specific ID no longer matters) - entry into OnChipDebug-mode (OCD) is blocked regardless of the ID code.
When attempting to read with protections enabled, TGSN will issue the corresponding error and will not erase the controller.
ID code 10x0xFF
For RL78, the ID code 10 0xFF is practically equivalent to blocking debug access.
After an erase, this ID is naturally set in memory, so it is necessary to program the controller before attempting to read it blank or use verify.