USBDM
MultiProg works with USBDM_CF_JMxxCLD or JMxxCLD, supporting DSC controllers (MC56F), on the MC9S08JM60 controller.
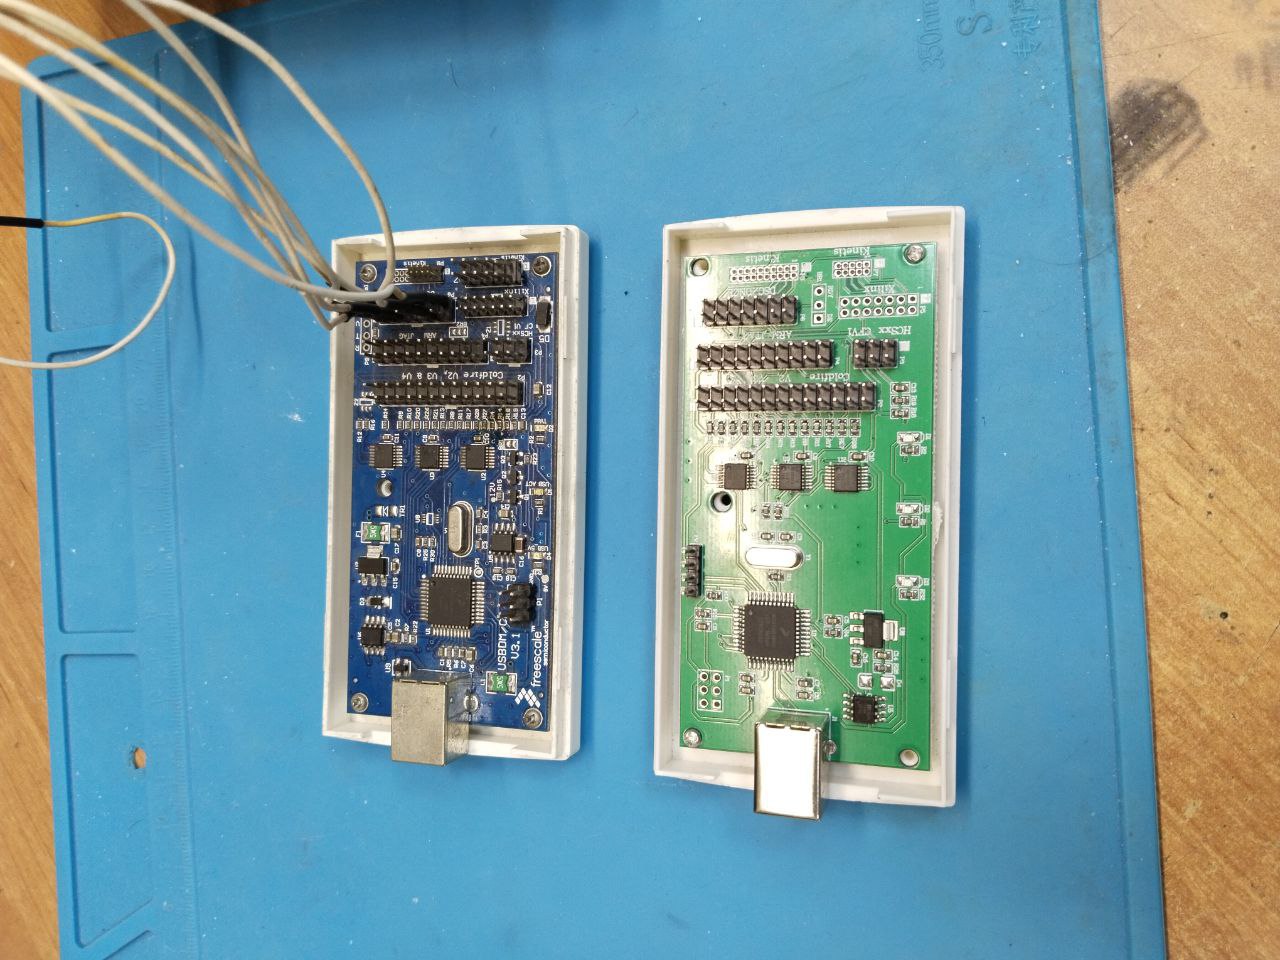
Starting with MultiProg 2.3.0, USBDM JS16 is also supported — for HCS08 controllers.
- HCS08 — can be programmed via either
JMxx (Full)orJS16. - DSC (
MC56F) — only viaJMxx.JS16will not work for these.
Preparing USBDM for use
Starting with MultiProg 2.3.3, USBDM drivers and the firmware updater ship in the bundle — you no longer need to download them from SourceForge. Bundled driver version is 4.12.3, updater version is 4.12.1.340.
On first launch MultiProg unpacks the archives into the user profile:
%USERPROFILE%\KuragaTech\MultiProg\programmer_utils\usbdm\
├── USBDM_Drivers_4_12_3_Win_x64.zip            ← Drivers (~5.5 MB)
├── USBDM_Drivers_4_12_3_Win_x64\               ← (already extracted)
│   └── USBDM_Drivers_4_12_3_Win_x64.msi
├── USBDM_FirmwareUpdater_4.12.1.340_slim.zip   ← Firmware Updater (~9.5 MB)
└── USBDM_FirmwareUpdater_4.12.1.340_slim\      ← (already extracted)
    ├── FirmwareChanger.exe
    ├── JS16_Bootloader.exe
    └── JB16_Bootloader.exe
The folder lives under %USERPROFILE% (C:\Users\<your_user>), so administrator rights are not required to run the utilities. The updater is a slim build (~9.5 MB; from the 183 MB original MSI only what's needed to reflash JS16/JMxx is included — no Eclipse, no GCC, etc.).
On typical USBDM errors ("USBDM not connected", "Unsupported USBDM programmer", "Firmware Updater", "Programmer not found") the error dialog shows an "Open USBDM Utilities" button — it opens the folder in Explorer with a single click.
The original USBDM author's documentation — in case you want to go deeper into the internals.
Before first use of USBDM — two steps.
Step 1. Install the drivers
- Open the
USBDM_Drivers_4_12_3_Win_x64\folder (or unzip the same-named.zip). - Run
USBDM_Drivers_4_12_3_Win_x64.msiand walk through the installer. - Plug USBDM into the computer.
- Make sure USBDM appears in Device Manager and is recognized without errors.
- Ensure the USB port provides enough power and the cable is in good shape.
Step 2. Reflash USBDM
Even if the firmware version number matches the current one — reflash it. Some suppliers (especially of Chinese clones) replace the firmware version number without updating the actual contents.
-
Open the
USBDM_FirmwareUpdater_4.12.1.340_slim\folder (or unzip the same-named.zip). -
Run
FirmwareChanger.exe.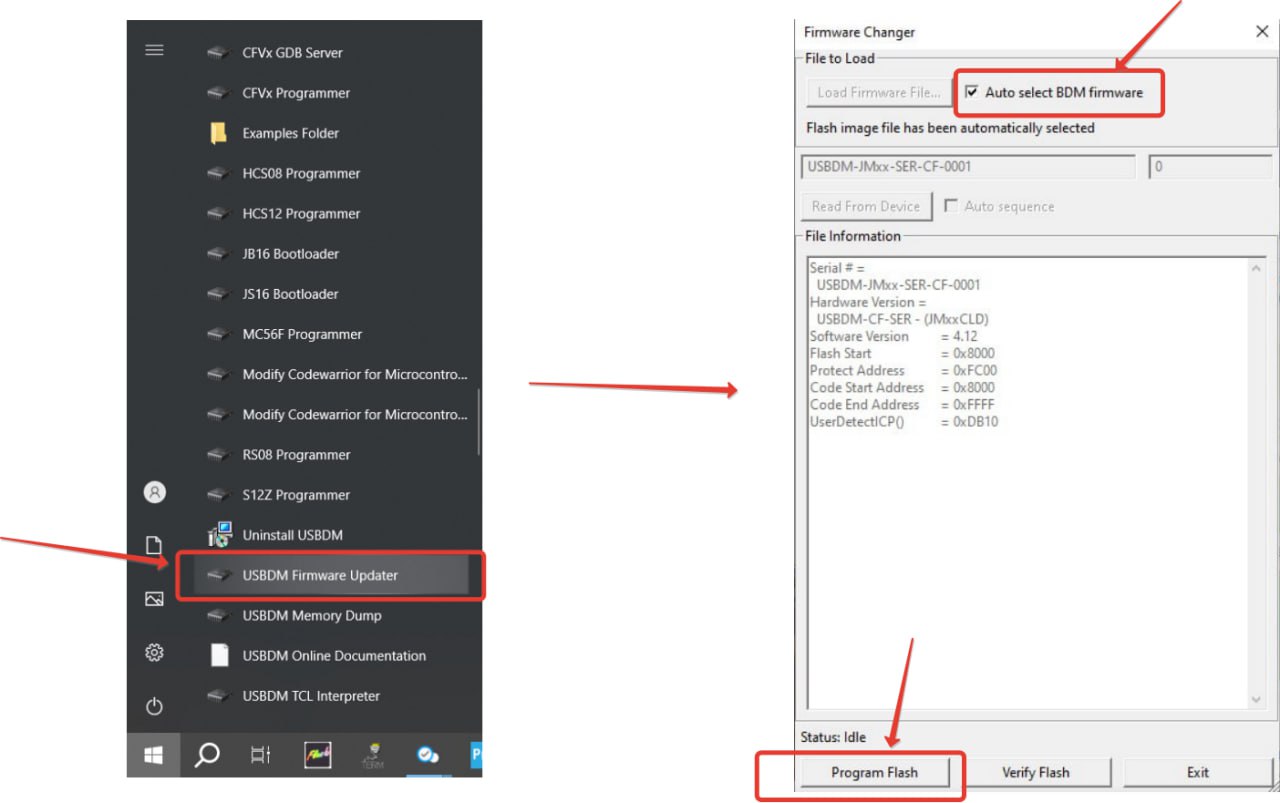
-
Tick
Auto select BDM Firmware. -
Click
Program Flashand wait for completion.
JS16_Bootloader.exe and JB16_Bootloader.exe in the same folder are separate bootloaders for cases where the standard FirmwareChanger doesn't see the USBDM (typically used for the very first firmware upload onto a bare MC9S08JS16 / JB16). They are not needed for a routine reflash.
Verification
USBDM JMxx (Full)
Select any USBDM target and press VDD.

The power indicator should light up on the USBDM. Press it again to turn it off.
USBDM JS16
On JS16, power is supplied not via software but by a jumper on the programmer board — don't forget to install it before connecting to the MCU. There is no VDD button for JS16 in the GUI, so the only way to confirm it works is to actually connect to a real MCU (select the target, click Read / Connect).
Power Selector
You can choose between 3.3V and 5V. To turn it on, press it; if it lights up green - power is on, gray means off. It is a toggle, meaning it can be switched; press it and it will turn off. Don’t forget to turn it off :)
Typical Connection
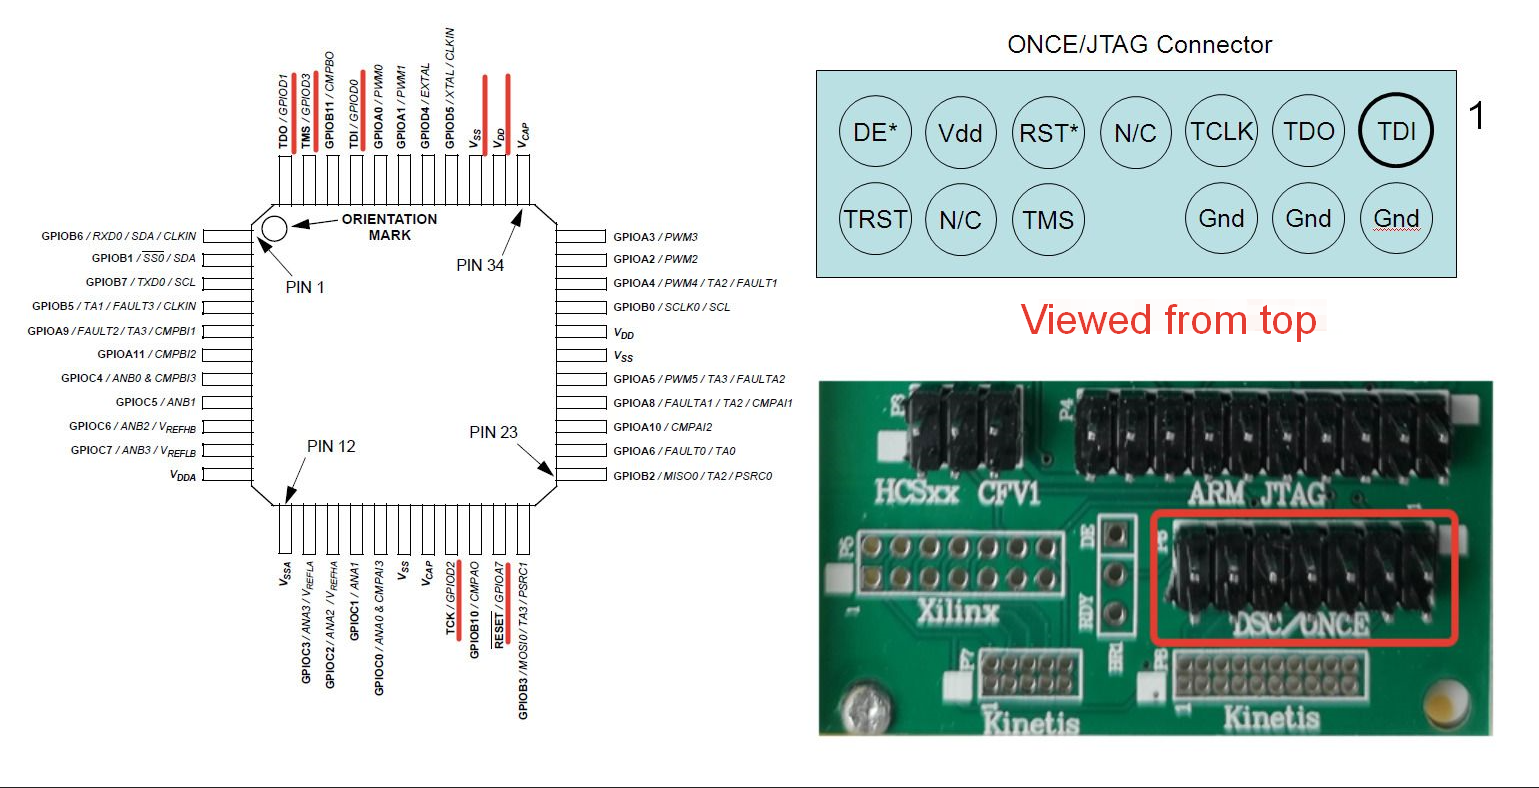
For an example, you can see the connection of the MC56F8035 controller. The connector marked DSC is used.
Common Errors
USB Error
- Drivers: Necessary drivers may be outdated or missing.
- USB Power: The device may not be receiving sufficient power.
- USB Cable: Check the integrity and functionality of the USB cable.
- Program Conflict: Two programs are trying to access the device simultaneously.
TargetNotConnected
The programmer is connected, but the controller is not found.
- Connection: Most often related to the connection to the controller.
- Actions Inactive: Buttons are gray because the processor is not connected; we cannot perform any actions with it.
- JTAG ID 0xFFFFFFF: This means that we attempted to connect via JTAG, but we have an empty line, i.e., the processor did not return any ID = not connected.
- BDM Firmware: This error has a 20% chance of being caused by a counterfeit Chinese USBDM firmware, i.e., a 20% statistical likelihood.
That's it! You and USBDM are ready to work. Let’s go! 🚀